Hello, sweet friends, I hope you are enjoying good weather and happy spirits! This is a fast and fun Fashion Friday tutorial. You can create an Easy To Make Fabric Headband.

The Supplies
I know many of us are longing to visit our hairdressers once again. My fine, thin hair grows VERY fast. I’ve already cut my bangs twice. My highlights now are almost halfway down the side of my head. With the humidity rising, I needed a solution to keep my hair looking tidy. For those of you who may need to hide silver roots, a fabric headband might be perfect for you. Let’s get started.
- Scraps of fabric
- Scissors
- Thread
- Paper
- Pencil
- Ruler or measuring tape
- Sewing machine or needle
- Optional: interfacing
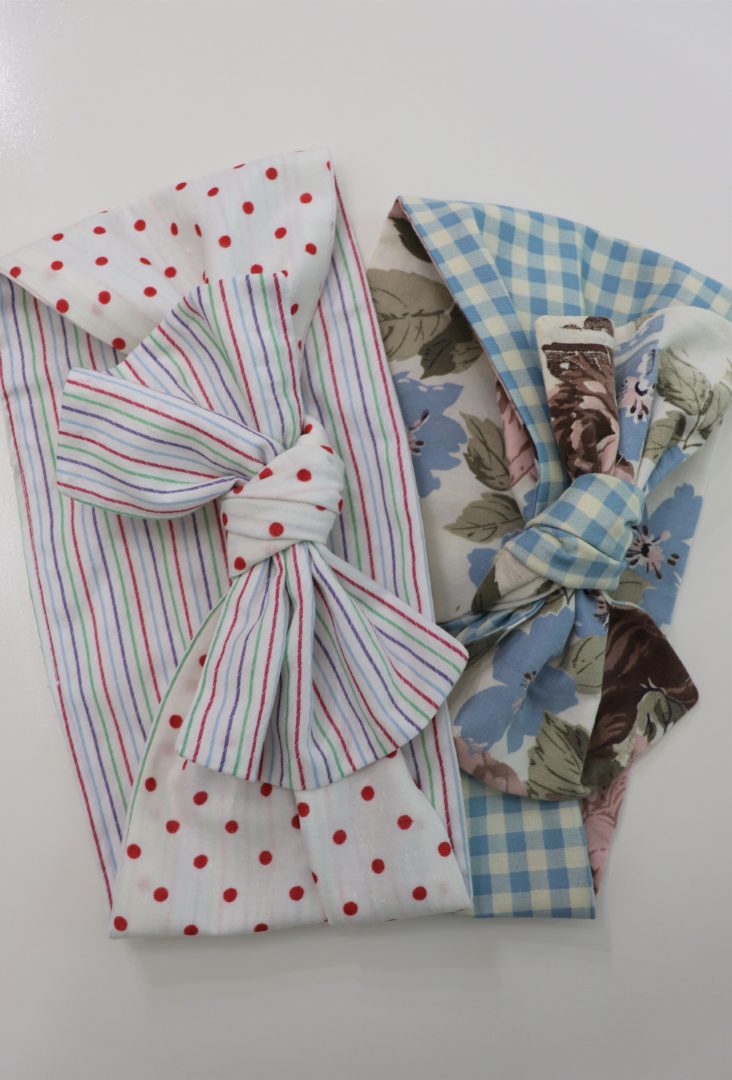
This tutorial will cover two styles.
The first is the narrow “bunny-eared” style.

The second is the 1940s style headwrap.
How To
To create the bunny-eared style you will need a long rectangular-shaped piece of fabric. The length and width can be customized to fit your head.
For my headband size, I used a strip of fabric that was 3 inches wide by 40 inches long (7.60 x 101.60 cm).
Gracie’s smaller headband measured 3 inches wide by 26 inches long (7.60 x 66 cm).
TIP: If you only have short scraps don’t be afraid to piece fabrics together to achieve the right length!

TIP: If your fabric is lightweight you may want to add a layer of interfacing to the wrong side of the fabric.

Fold the fabric in half lengthwise. The open end pieces will be cut into a rounded shape.
Each headband requires two long pieces. They can be cut from the same fabric or two coordinating fabrics.

I made my pattern using copy paper I taped together. While I freehanded cutting out the rounded end some of you may need a pattern. Smile!

After you cut out two separate pieces you will pin the two fabrics right sides together.

You will then sew the two fabrics together.
Start to sew a bit off-center so the final closure seam will be hidden at the base of your neck. You will also stop a bit off-center.
Here is a visual aid: begin sewing where the PINK pin is located and sew all the way around stopping where the RED pin is located.

Once the fabrics are sewn together you will turn the fabric right side out through the small seam opening.
Press the fabric neatly down.
Then sew the open seam shut.

The headbands take about 20 minutes to make from start to finish.
I made several headbands in colors that I wear most often.

1940s Headwrap
The wider 1940s headwrap follows the same construction process.
The only difference is that you cut the width wider and do not round the fabric ends.
The fabric for my headwrap measured 7 inches by 40 inches (17.78 cm x 101.60 cm).
Again, the fabric can be cut wider, shorter, or longer to best fit you.

They are even quicker to make since you do not take the time to round the ends.

This style would also be cute to wear over pin curls to keep hair neat and tidy while it dries.

You can also put your hair in a high ponytail if you want to get it up off your neck. Then fit the narrow headband underneath it.
It’s not quite that warm here yet.
As always I try to leave you with a smile. Gracie cannot WAIT to go to the groomers and get a pawdicure.

Happy Friday!
Laura
These are really cute, Laura. We’re all having the hair issue. This is a delightful and fun solution!
What a cute idea! I remember seeing pictures of my aunts wearing headbands like that–and also Lucille Ball on I Love Lucy. Now…I really think you need to make face masks to match those. lol…just a thought…..Hugs and Stay Safe-Diana
Hi Laura, You look gorgeous in everything! It amazes me how many of these headbands you have already whipped up and Gracie is such a cooperative model. Take care and stay safe to you and yours. Joan
Absolutely gorgeous
I look forward to following your instructions and making some for myself, daughters and grandchildren .
Geraldine x