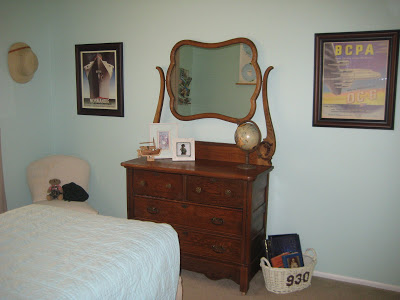
In last Monday’s post I revealed the completion of Sweet Boy’s room. One element of the room that visitors have commented on is the sweet little basket that you see on the floor to the right of the dresser. Typography is so popular right now. Both Pottery Barn and Ballard have several items in their catalogs. But as you may know, I always like to put my own twist on great ideas.
Make your own typography basket
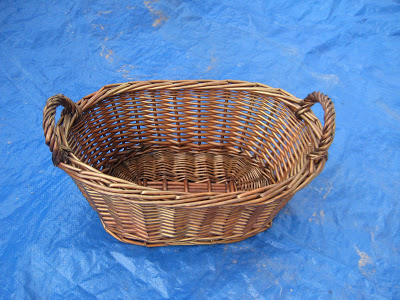
Last April I attended a really great garage sale and found this sweet basket for $2.00. While at the time I didn’t have a use for it, I knew eventually it would get a makeover and find a place. Fast forward to summer and I realized I needed a basket to store Sweet Boys books in. Out came the spray paint.
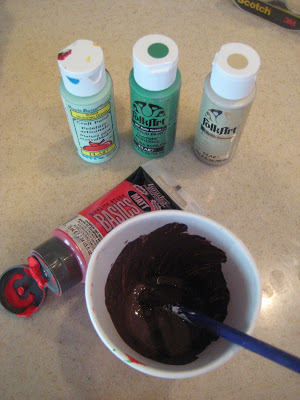
While waiting for the basket to dry, I dug through my craft closet hoping to locate a bottle of brown craft paint. Much to my chagrin, I didn’t have any. Since I am currently committed to using up what I have on hand, instead of spending money, I had S.B. mix a bit of red and green along with a dollop of champagne. Sweet chocolate!
Tip: I use a color wheel regularly. They can be purchased at any craft store for a few dollars. Keep one on hand if you want to become a master color mixologist.
Gem of the day: Letting your kids mix the colors during summer vacation keeps their hands and brain occupied.
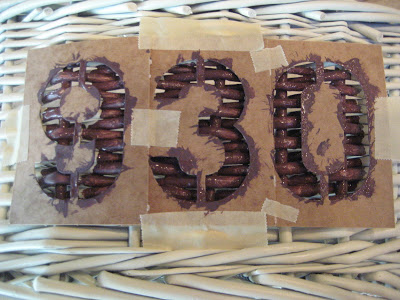
Next, I taped a few numerical stencils to the basket. The great thing about making your own typographical creation is that you can select a combination of numbers or letters that have personal meaning to you. S.B. chose “930”. He proclaims it is “The best day of the year.”
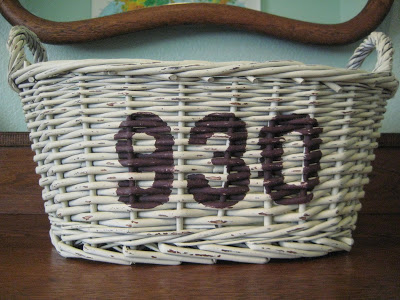
While the wicker was a bit tricky to paint on, it turned out ok as I was seeking a vintage finish. After letting the basket dry overnight I sanded down several key areas to give it the worn feel I was seeking. S.B. then had the pleasure of filling it up with his weekly library selections.
How not to go crazy tip: If you place library books in a designated basket it eliminates the tears often associated with finding a lost book that is due.
Other Room Elements
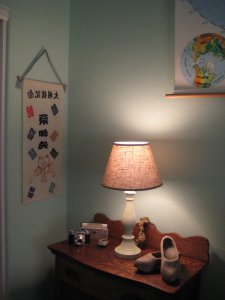
Another element in the room that has personal meaning is this banner. Early in his Air Force career, Mr. Decor was stationed in Japan. He received this piece of cloth at a Sumo wrestling match. It has been at the bottom of a drawer for almost 20 years.
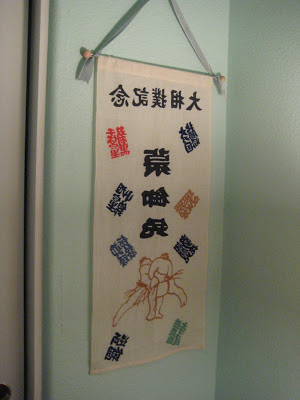
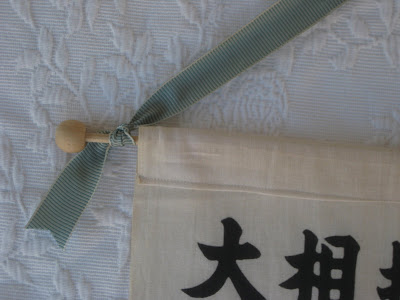
After a gentle hand washing followed by line drying, I sewed a simple rod pocket on the back just by folding the banner down and tacking it with a straight stitch. The thin rod and wooden caps were purchased at Michaels for less than $1.00. I didn’t even paint them. The ribbon came wrapped around the comforter I bought for S.B.’s bed at Target.

I love this look. The basket came out great. Lori
Everything just tied together so well. I love the basket!
Glad you are enjoying your bracelet!
Love,
LuLu~*xoxo
That basket is so awesome. I have a basket like it…I am going to do the same thing..or at least try. I love numbers on anything.
Thanks so much for the “how-to”!!
It looks great. I too am trying to use what I have on hand to redecorate. I think I am having more fun trying to figure out how to make my old things new again.
Willow
Good Morning Miz Laura,
I can't believe I totally missed seeing that charming basket in the first post! I'm totally going to have to copy cat your idea! Love it, love it, love it! Thanks for the tutorial *smiles*
I love it! I am definitely going to give it a shot! Thanks so much for sharing!
Roeshel
Such great ideas for using what you have. I love the basket for SB's books. He must love his new room.
Love the basket! I too did some repurposing painting this weekend with old brown frames. Saw you on SITS. Have a lovely day!
I like what you did to the basket. You are very creative and it's perfect for books and magazine. The sumo wrestler banner is a nice added touch!.!…Christine
What a great idea, and the basket came out great. Love it. Such a cute room. Hugs, Marty
I have a couple of wicker baskets like that, but bigger. I use them in the kids rooms for toys. They work great and I like the fact that all you have to do is paint them to make them fit the room
I LOVE the basket idea! Writing that project down on my “to-do” list. I have several of these same baskets that I don't use anymore. Well, if they were as cute as yours, I would…and I shall after I get around to them! Thanks for the idea!
Nancy
What a great idea for those old wicker baskets!! I have a large one that would be so cute all done up like this with the typeography…I'll be adding this to my project file! 🙂 Your son's room looks amazing, I love especially all of the family items you incorporated & the vintage maps and globes–such a great look!
Laura, I really like that basket! Great job. Sally
I love this idea. I get so excited when I see people re-using regular house hold items. My son loves to read and I need to make this and put it on the stairs for when he is reading books downstairs. This way his books don't get lost and at the end of the day he can just grab whats in the basket and bring it to his room.
Thank you so much for this great idea!! Dollar store here I come, they have great baskets there and I already have the paint.
Love the basket, thanks for the idea. I like your idea of using what you have, The room looks great.
Thanks for sharing.
Sue
The basket is gorgeous! I'm inspired.
Laura,The roomand the basket ,even the banner are just fantastic.You did a wonderful job.Do you know anything about making glitter paint?You cannot but cream color glitter paint.Have any ideas?XXOO Marie Antionette
Love it so!!!
Hey! Just visiting from Suzie at Bienvenue!! Love the basket–it turned out really cute! I plan on some decorating next week!! Great ideas!
Hugs
Susan
I love this. I too am inspired! x
HOLA LAURA! QUE BONITO TU BLOG! UN SALUDO DESDE BS.AS. GRACIELA
What a great idea!
Yup! I do love making something out of nothing! Super Cute! 🙂
~Liz
love the basket,,thank you for showing us what can be made with very little..
You are completely right about making do with what we have on hand – using a color wheel to mix brown was clever. Is 930 his birthday?
I save ribbon too – glad to see yours is finding a use!
Great ideas! I just love those ribbons that come on bedding and such, lol..
Beleive me, doing hair I know the color wheel by heart. Just imagine your hairdresser being the mad chemist in the break room… mixing 5 colors to get the ONE she's out of. Yep. That's me! HA!
Love the room!
Great idea! Is this room blue? I looked back at the original post and still could not tell. I am looking for a very pale blue–it ends up either too dark, too pale, or too gray!
Those are both such awesome ideas! I love the sumo wrestler sign, its so vintage Japanese. And I can think of so many things in my sons room to apply typography to. Thanks!
BTW, I left you a little something on my blog if you'd like to stop by! 🙂
Your basket re-do looks terrific. What a very special room! I adore how you've decorated with family heirlooms.
You did a great job on this room. I truly loved your wisdom of using what you have and not buying more “stuff”. Oh are they words to live by (especially with my arts & crafts supplies)!! I've never tried mixing paint colors. I always seem to like what I have on hand, but I think I may try that. What fun!!
YOU'VE BEEN TAGGED.
Visit my blog to find out what that means.
Thank you so much for all your creative ideas. I look to your site, whenever I want to learn something new, which is pretty much everyday!!
I really like the basket. What a good idea! And smart to get him involved in the making of it. I'm guessing my boy would choose 329 for his number. You've inspired me to get going on his room!
that is so fabulous! love it!
can you believe that rebuilding a home doesn't scare me but stenciling does? i know!!
happy day and thanks for visiting me.
That basket is so pretty. i really need to find a good sized basket to do this to. Great job!
Ya know I love stenciling and I LOVE this! Great idea! I would have overlooked a little basket like that at the thrift store or a yard sale before — just goes to show what vision can do for ya. LOVING THIS TIP!
Thanks for stopping by my blog today!
I love how the basket came out, I'm going to have to try this. The whole bedroom you made over looks awesome.
It looks fabulous! Not too hard to do either…I like that kind of project. 🙂 Thanks for sharing it with us. Thanks for the visit today!
love the basket!
Ooh – I love this. I know just the baskets I'm going to do this to. Thanks
That basket turned out beautifully! Bravo.
That turned out really cute. And you made it look so easy too. 🙂
What a wonderful idea and it turned out great!
Laura, I just adore seeing what you will come up with next. You are so talented! I may have to borrow this idea for my classroom. Blessings to you!
HI Laura! LOVE the basket, I will have to try that one, I have a magazine basket just begging for a cool makeover! Thanks for your sweet comment on my topiary!
” I just adore a “use what you have on hand decorating” concept, don't you? ” … Yes, I do! I feel all giddy when I find JUST what I needed lying around the house. 😀 Love the basket… I have one exactly like it (pre-paint). It was my grandmother's.
I find Pottery Barn kids inspiring 🙂
Thanks for stopping by to see the boys' curtains.
Happy Creating!
Micah from Finding Shae
that looks great! i am going to have to tuck it away for future use!
I would never have thought of that! Great job.
So GREAT! I could picture using this idea to paint a house number on the basket and fill with goodies for a new neighbor!
Looks great! What a familiar project 🙂
Thanks for stopping by!
The basket is darling. Thanks for sharing!
Great job, I would have never thought to stencil on a wicker basket.
I love the basket! The paint mix is superb too. And the Sumo wrestling panel is perfect.
I love the basket…I just got one the other day at Michaels…looks like it will be getting a little personalization to it!!
These are the RAGE right now. I love your spin on it.
Looks great!! I love using Pottery Barn for inspiration. Thanks for stopping by my blog today
WOW!!! That looks awesome!!!!! I love topography. You did an amazing job!!!
The basket is great! And fun for him to choose the numbers! 🙂
very nice, i will be putting this in my future projects file
What charming accents!
I adore using what's “on hand” too–but some of us (Namely you) do it so much better!
What a great idea! I love baskets AND Typography…what a nice way to combine them both!
You are a stinkin” genius!!!! Love the chair,love the basket!!!
Hugs, Tricia
I love how you get boyish decor in there too… I need to come and visit you and just soak up your decorative wisdom and wonder. 🙂