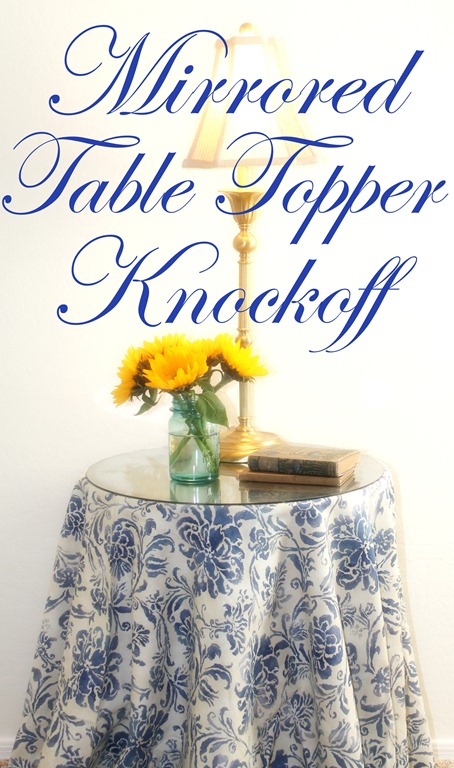
A few weeks ago I was looking through the Ballard Designs catalog and something caught my eye. A lovely table that was beyond my budget. So I wanted to make A Knockoff of the Ballard Mirrored Table Topper.
A Knockoff of the Ballard Mirrored Table Topper
I spied the Antique Mirrored Table Topper. In our home, we have two such tables that have a clear glass topper. I wanted it. Bad! But a topper to fit my large 36” table was $179.00. Yikes!
So I thought and thought about how I could DIY it. One day I remembered that I had seen something about two years ago on Design Sponge. Sure enough, I found a tutorial on creating an antique glass votive. Yes! An antiqued mercury glass table topper would be perfect!
Then I had to think some more because a votive is one thing, a large glass table topper was another.
I actually had an extra 24” glass table topper that someone had given me so I decided to practice on this piece first. You can find such toppers at most home décor stores, as well as Target and Wal Mart.
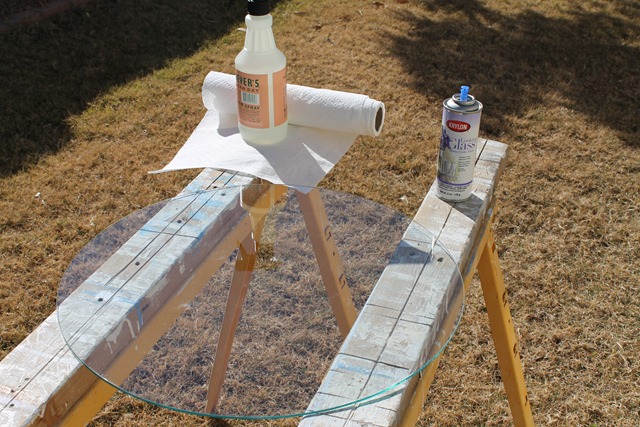
Mr. Décor set up two sawhorses so that I would have a stable flat surface in the backyard for painting. I made sure that the glass was squeaky clean before I began the process.
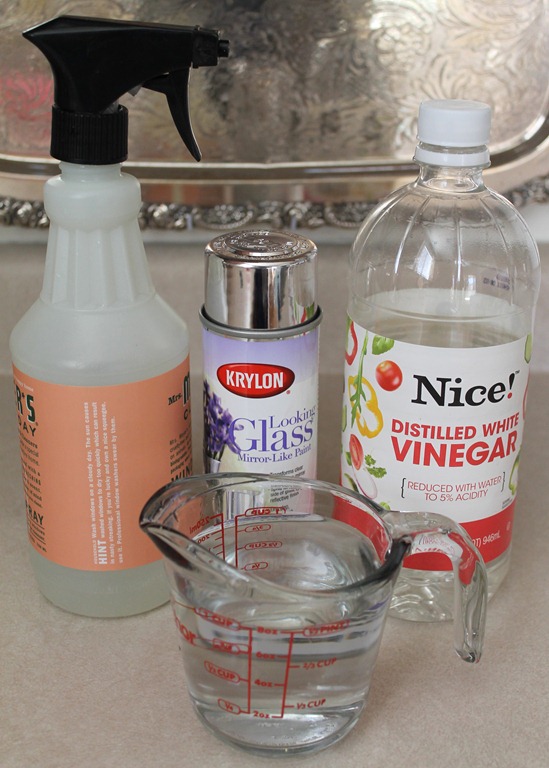
The Supplies
- One clean and empty spray bottle filled with 1 cup of distilled water.
- If you want more of a crackled finish add 1 cup of vinegar to the water in the spray bottle.
- Paper Towels
- One can of Krylon Looking Glass Paint.
After a 5 store search, I finally found the paint at Wal ~ Mart. It’s a tiny can and cost around $8.00. The price and size actually made me pause for a moment in the aisle. But then I weighed the $8 versus the $179.00 and bought it. It ABSOLUTELY has to be this product. I also followed the instructions on the can and shook it up like nobody’s business!
Instructions
Spray a fine mist of the water and vinegar solution onto the clean glass. You want tiny droplets of water to cover the entire surface.
Immediately after, spray on a light layer of the mirror like paint. You want a thin, even coat.
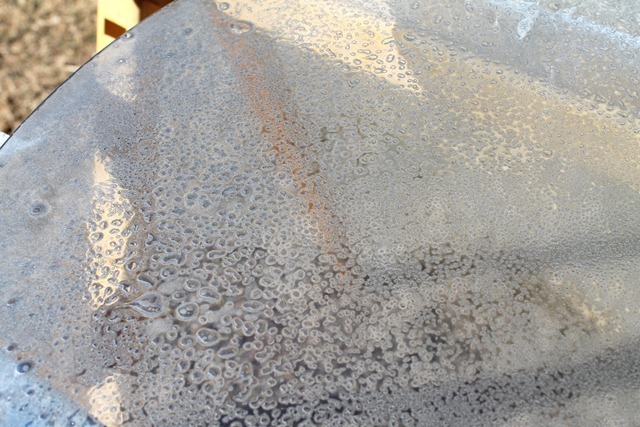
You will see within 30 seconds that the mix will begin to bubble.
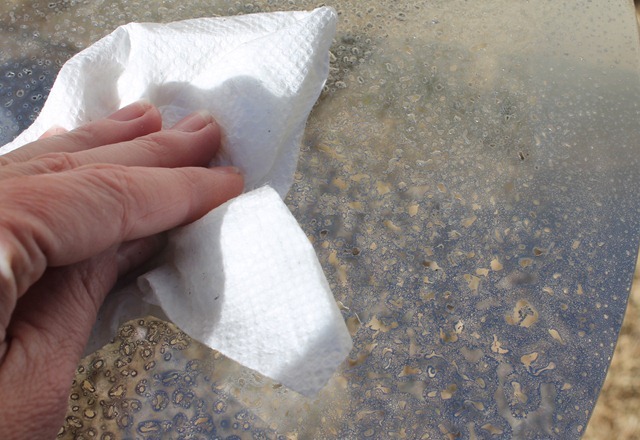
Wait another 30 seconds to one minute when the finish looks like it’s beginning to dry and take a paper towel and gently blot the entire surface. Some of the bubbles will pop. Do not rub or scrub as this will remove the paint.
Then walk away for 10 minutes.
Come back and repeat the process.
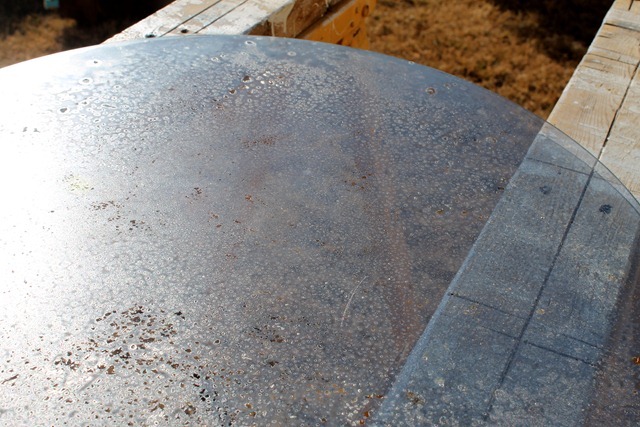
This is what the surface looked like after the second application. The glass begins to appear more opaque.
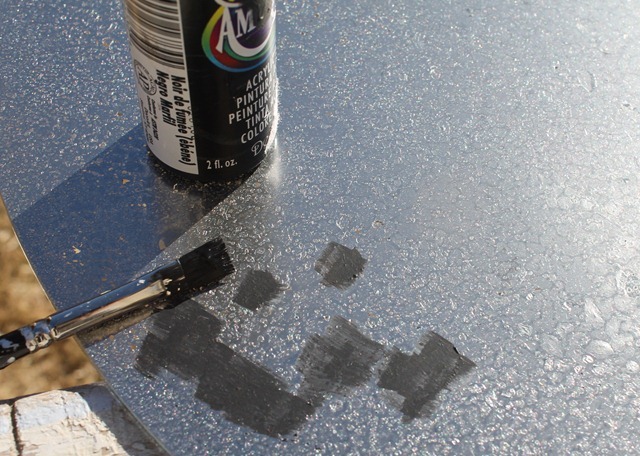
After three separate coats, I took a bottle of black acrylic paint and dabbed areas here and there. I let it dry for about 5 minutes and then did one final coat (for a total of 4) of the water/vinegar/mirror spray combination.
It was left to dry completely for 3 hours.
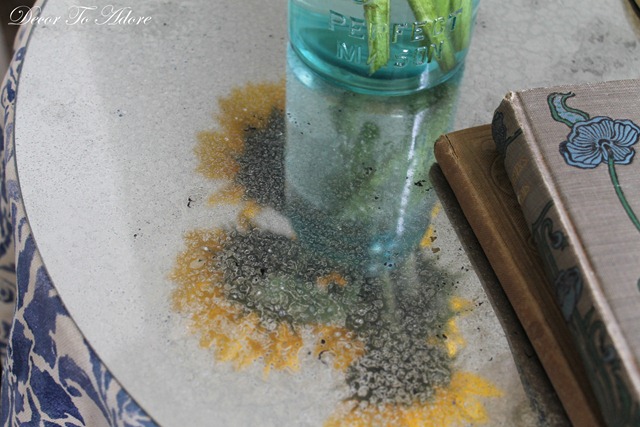
Magic Mercury Glass
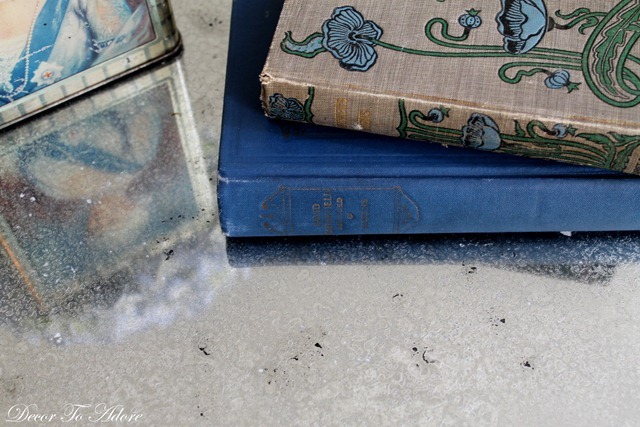
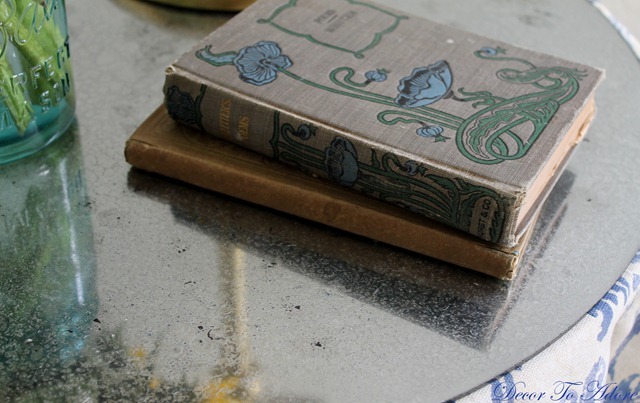
Now the magic is that once you turn the glass over it indeed has a mirror-like finish. You can also see the areas that I added a wee bit of black acrylic paint. (Click on the photo to enlarge it if you like.)
I am REALLY happy with how this project turned out! This particular table will now go in the man cave. (We are debating between a Chevron fabric or this Ralph Lauren Damask/Ikat fabric.)
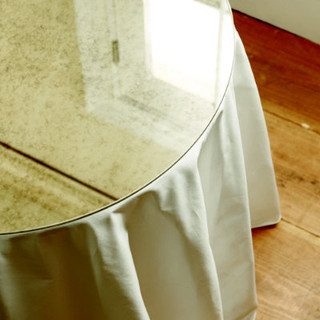
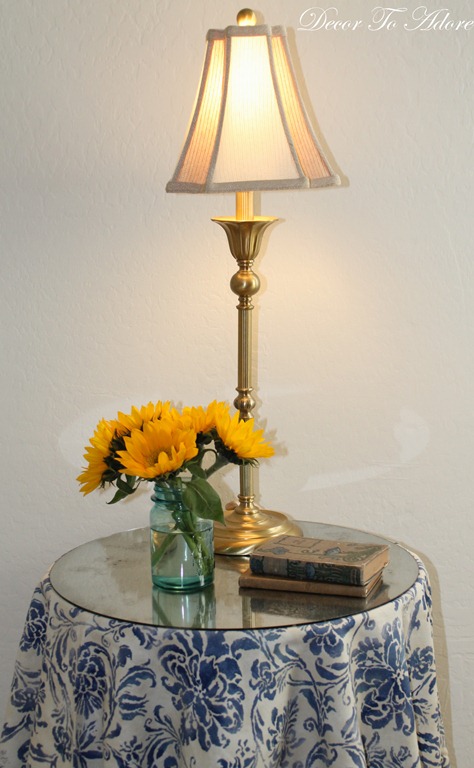
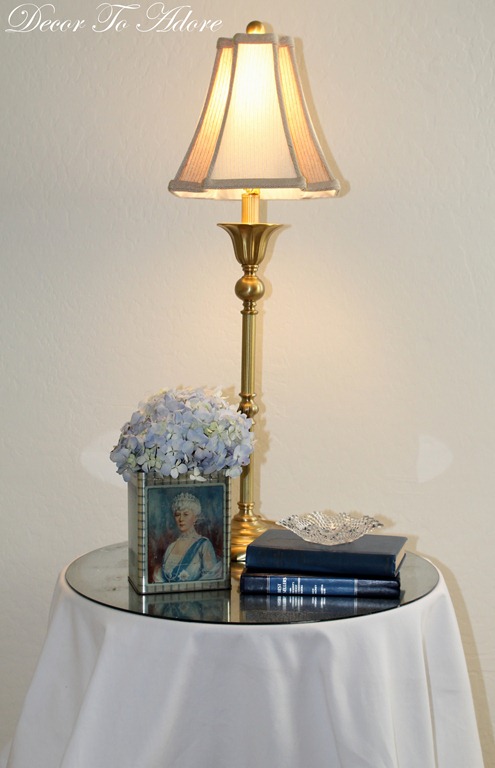
Now the question is whether or not to paint the massive glass topper in the living room. I set up a vignette with a white cloth as that is how the table is normally dressed.
Not bad for an under $10 knockoff!
 So what has inspired you lately?
Laura
Hi Laura,
Your table top turned out beautifully. I love the technique and I might have to give it a try.
hugs
Sissie
That turned out WONDERFUL!!!! I loveeeeeeeeee it!!!!
Brilliant! I am book marking this one, would love to try the effect to plain framed glass to back some iron candle holders. Thanks for sharing!
It looks beautiful! That paint is so fun to use.
It turned out great Laura.. of course from You, that's what I've come to expect:)== no pressure of course lol. I have no doubt you can do anything and you proved that again with this project.
You are so clever. I love this. It looks fabulous. Great tutorial too. Hugs, Marty
Thanx for the awesome tutorial… glad to know location of where to buy the looking glass paint…thanx, tiffany
my castle door is always open @ the “royal blog”…
I'm loving this look! Very well one Laura! Have a great week!
Jan ♥
Amazing! I haven't seen that particular paint…but may be motivated to look for some. Wondering what I can spray with it! 🙂
Great thrifty idea!
~april
Your table topper looks awesome! I think I may have to try this on something…not sure what…it just looks so cool I have to give it a try 🙂
Kelly @ Babiole de Windsor
As always, you are a marvel of DIY magic…..I bow to the master.
I hope you know that once you learn your photography lessons, you're going to have to teach me……
Love ya,
Meri
Laura, you never cease to amaze me the beauty you bring out in simplicity. Stunning redo finish … you inspire us all.
Have a beautiful day ~
TTFN ~
Hugs,
Marydon
Love this! So effective.
– The Tablescaper
I found a small mirror top table at GW but it is in sad shape as far as the top goes. I wonder if this would work on restoring it to somewhat new condition…hmmm Hey have nothing to lose, the table was only $5 and I was just going to cover it up with a place mat so…looks like I am going to have to go to Walmart and find this spray. Thanks for posting and I sure am going to pin it to my Pinterest. Love Love Love your DIY projects. 🙂 Keep them coming.
That is amazing! I love the soft reflection in the antiqued finish.
Your tutorial is so clear and easy to follow. I think I would start with a little piece of glass like you did before tackling a huge one. Thank you for sharing another one of your many ideas and talents! 🙂
The transformation is amazing! I wish there was a product to restore an old mirror back to near its original self. I have a huge dresser in our bedroom with double mirrors that have deteriorated to where you can't really see in them. May have to bite the bullet and have new ones custom made.
I love it….but, to me it looks scarey to do. I think I will stick to my modge podge!
That is awesome Laura! I just saw the same technique used on another blog for the glass doors of a china hutch. Beautiful stuff!
That came out great! Looks wonderful! I think I need to try that technique! Thanks!
Lovely in every way! Thank you for the tutorial. (And I thoroughly enjoyed your post yesterday, smiled at how “adversity” can bridge age differences.)
Laura from sundayview.blogspot.com
That looks amazing! You really made it look expensive. 🙂
This is a great idea and such a big change to an otherwise bland clear glass table topper. Love it!
For some reason, I am having trouble leaving comments today, so if you get more than one for me, please forgive. I just wanted to say that this is very pretty and such a great change from a clear and plain glass top. Good job!
Good job! That is such a neat idea.
Stunning results! A winner!
*hugs*
Kelley~
Beautiful! Thanks for the how-to.:)
PS Just have to let you know how much I enjoy your Sunday posts. They are always so encouraging. Thanks for being so real and for sharing your heart. I look forward to them every week.
This is a great tutorial and finished project. I'll have to Pin it so I can remember how to do it. I've been noticing some of your cuteness on Pinterest lately. Happy day, msk
This is a great idea. It looks expensive but is cheap to do. I'm going to see if I can find this mirror like paint in Australia. Bisous
The glass looks GREAT! I am impressed with how the little black spots turned out looking very authentic….I haven't heard of this paint before, but sure I could find a few cool uses for it….thanks for the tips!
Laura, the glass looks wonderful and I wouldn't say it was a knockoff at all. This technique could be used for many projects. Thanks for the step-by-step! Ann
That looks so pretty! Very nice project. Thanks for the step by step instructions too!
This is a great way to get a mirror top table! Pinning.
I love this idea. I have some glass toppers in the attic because I recently changed out a few tables. Now, you make me want to drag them back down but do this to them. I love it.
Also, I had to tell you how fantatic your post was on Sunday. My mother told me about it because I've been too distracted for blog land lately. She actually brought her laptop to the table after Sunday dinner and read it aloud. Everyone was applauding you! I loved that.
Laura,
Your table topper turned out lovely. Please keep us posted on how it holds up. A clever and affordable solution!
Your Friend,
Deborah
FairfieldHouseNJ.com
What has inspired me lately? YOU just did! I have a 24″ glass topper on which (years ago) I decoupaged a decorative paper to the back. I've been getting really tired of it lately, and this is just the look I want! Now if I can just finish up some other projects so I can start on that one!
BTW,great post Sunday! As one who was also an “older student” (and wife of a longtime college administrator who knows the ways of faculty), I understand EXACTLY what you were going through. Great response! Good luck to both you and your “film nerd” friend!
Love this idea!!! The table topper turned out great, so pretty! And the good thing is, I have two of these table toppers and can't wait to try this technique on them!
I love this idea! It looks so chic. 🙂 I saw a tutorial for doing this to mason jars on Pinterest but I never would have thought of a glass table topper.
That turned out great! You are so creative!
In answer to your question… Laura, YOU have inspired me lately. We redid our master bathroom over the weekend and it looks lovely.
Next up, we need to update the light and mirror fixtures in Sarah's bath to complete her redo and I want to repaint the bottom portion of our master bedroom walls (leaving the rose stenciled border at the top which I adore).
Your table topper is lovely!
Linda
It turned out perfectly, Laura! Your tutorial was great. Thank you for sharing!
wow, this is really cool Laura! THanks for sharing this!
What a great leap of faith and it turned out so well…looks great. Don't know on what yet but I want to try this on something.
Jermaine
This is such a wonderful gift, and I'm sure will be treasured by your daughter!
This is so lovely.How clever of you to take an idea you saw somewhere else and use it in a new and creative way. I have been wanting to make a tablecloth covered table for awhile however finding an unfinished round table is proving difficult. I won't pay the $80.00 that Ballard is asking. I have to ask where did you find that gorgeous blue and white print fabric?
Hi Nancy,
This was the only way I could respond to you so I hope you see this message.
You can find round tables at Bed, Bath and Beyond, Wal Mart and Target. I even found one at Goodwill. 🙂
The tablecloth was a recent score at HomeGoods.
Thanks for your quick response to my questions.I very much enjoy your blog,especially all things British!
Love this idea!
I just wanted to say I also really enjoyed your Light Meter post! Some of my favorite peers in undergrad as a Studio Art major were my adult class mates! I really enjoyed their different perspectives from their stages of life and appreciated having them in my classes to mix up the dynamic. So glad you stood up to your professor and have a friend in someone younger. I hope he can learn a thing or two from you the way I did from my friends in school!
Hope you have a great rest of the semester!
Thank you so much for the tutorial. I'm going to do this today with three glass top nesting tables. The tops are 12 x 12″, 14 x 14″ and 16 x 16″. The quote I got from a local glass shop was $629.50!!!!!