In Monday’s post I shared with you that I had covered up a decorating faux pas with a paper rosette. The Paper Rosettes are so fun and take just minutes to make.

Supplies and Tutorial
You will need:
Three pages from a book. (For the rosettes I’ve shown it was an average sized paperback.)
A hot glue gun (Although you could use regular glue and a clothespin to hold the pages in place while drying.)
A bone folder (To help create a crisp crease/fold.)
You can purchase bone folders at any craft store. They come in a variety of sizes.
Now I could have spent approximately one hour trying to photograph myself creating a paper folding tutorial, and another hour uploading and adjusting the images, etc. but of course some other brilliant person in blogland has already done it. Thank you Kirsten from The Crafting Chicks. I can now use the two hours to craft other things. (Working smarter, not harder.)
Take one book page and make one even fold approximately 1/2” wide. (No need for a ruler though.) Just as you made paper fans as a child, make another 1/2” fold in the opposite direction. I actually fold my pages from the bottom of the page, up, verses the side to side shown here. Continue to do this for the entire length of the book page. It will then resemble an accordion.

Fold the pleated page in half. While Kirsten used tape, I added just a bit of hot glue inside the folded edges to secure. You can also use regular glue and a clothespin to hold the folded page in place until it dries. (A good option for kids.)

Once you have three “fans” you will then glue each fan to another forming a circle.

Your finished rosette will resemble something like this:
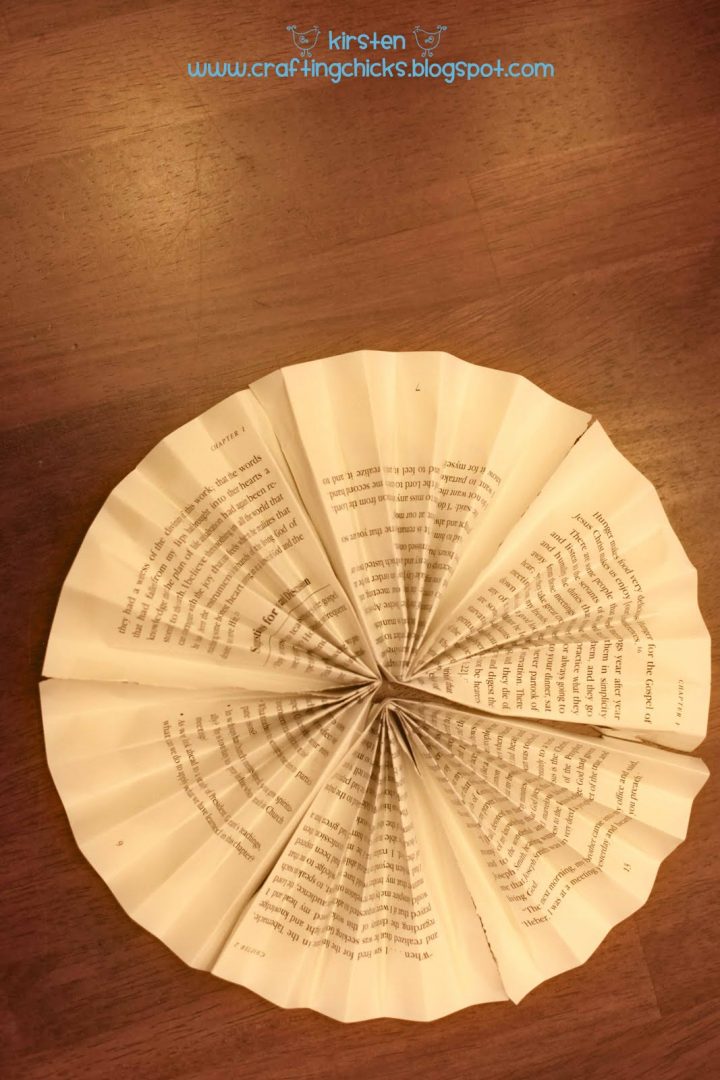
Paper Rosettes
Once you have your rosette you can then add a paper doily to the back and a punched image on the front. Creating a rosette sandwich of sorts. I also added a bamboo skewer so that I could tuck it into the netting.

The image used for the above rosette came from the wonderful Graphics Fairy.

Of course you can forgo the doily and add the rosette directly onto other surfaces such as a gift bag or chocolate bars.

Whooo did the owl image? It was of course The Graphics Fairy once again. I just used a circular paper punch and added a bit of Stickles gold glitter glue to the leaves.

The rosettes can be strung together to create darling banners as well.
So are you a “fan” of the rosette?
Laura
I still have YET to try making these!! Silly I know! I need too! I loveeeeeeee all the different ones you shared here today! :):):):):):):):):):):)
Laura,
The paper rosettes have such a vintage feel and transport me back to my childhood room which had a collection of rosette ribbons strung on the wall that I'd won in horse shows. Thank you for sharing the tutorial.
Your Friend,
Deborah
Thank you so much for this tutorial. I will try them.
Les
Merci beaucoup pour les explications…
gros bisous
You asked if we were fans of rosettes. I wasn't until I saw yours. Now I AM ❊
Yes, they look great. I am constantly in awe. I will need to check out the graphics fairy, too.
Yes! Love them!
xoxo
Kathleen
So THAT is how you do it! 🙂
Thanks for so freely sharing your know-how!
~april
So cute! I'm thinkin' Christmas ornaments and tags.:)
Oh, I'm going to steal this idea for some Christmas Decorations… You know for those tiny corners in the house that are just begging for some tiny and sweet detail.
That's Lovely! Amazing that an easy to do has such impact… You're The Best!!!!
My mind is wandering and I'm thinking in adding a rosette to the gift packages of literary friends 🙂
Awesome tutorials! You are so creative!
I need to make rosettes tomorrow… going to buy a second hand book – hopefully a hymn one – because I couldn't come up and destroy one of mine…
Thank you Dear Laura for the tips. I'm not even going to print as it is very well explained…