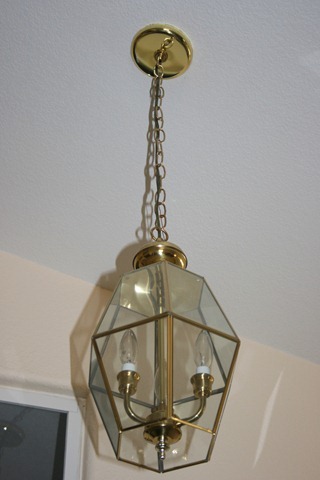
I have been giving this brass light fixture, which hangs in my entry, the evil eye for seven years. I finally decided to do something about it. The makeover budget was less than $20. A Light Fixture Goes From Brass To Class
A Light Fixture Goes From Brass To Class
A favorite blogger of mine, Julia from Hooked On Houses, wrote a post over two years ago in which she gave a similar light fixture a makeover with spray paint. I gave it serious thought. For two years.
I really wanted to try and turn my fixture into a French lantern. Like this:
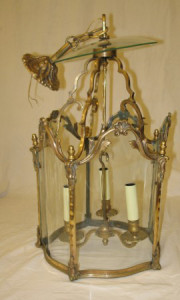
After two years, countless garage sales, visits to the HFH ReStore and a trip to France (which included the Paris flea market) the end result was that not a single lantern could be found in a reasonable price range.
I accepted that perhaps I needed to change my vision. I began to see more and more drum shade chandelier fixtures being used in home design.
Like this:
and this:
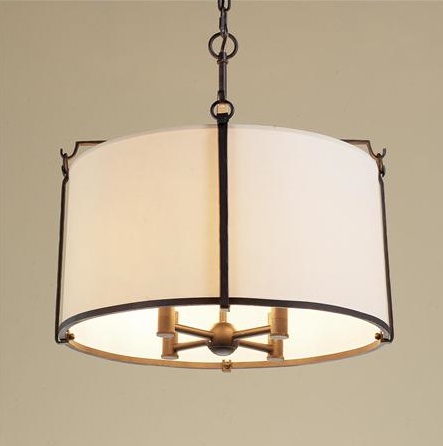
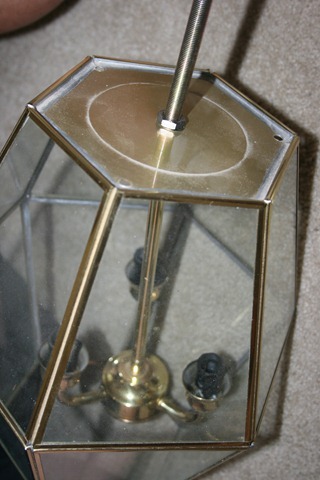
Taking Down The Light
Walking around Homegoods I found a lampshade that was the right size and a color I could live with. It was also priced right at $12.99. On the way home I bought a can of Rust ~oleum Hammered Spray Paint in brown (but it looks like oil rubbed bronze) from Lowe’s. It was on sale for $4. The 8-foot ladder was brought in from the garage and into the house. I had to enlist the services of brave Mr. Décor because even standing on the top rung (I know, I know) he could BARELY reach the lamp.
But we got it down.
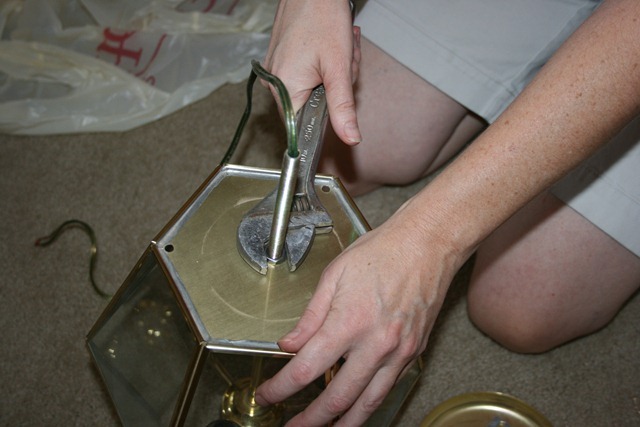
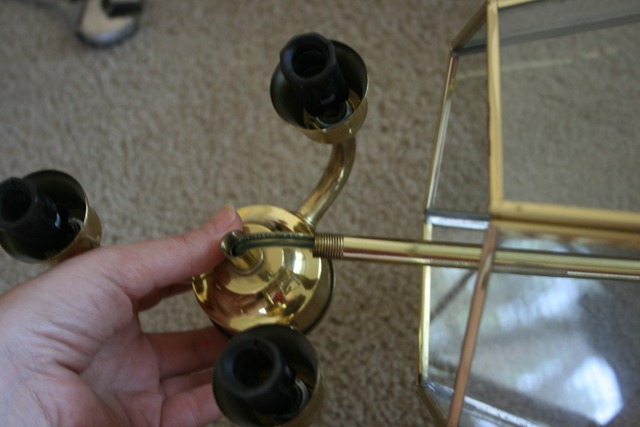
From there I took that baby apart. It was surprisingly quick. Mr. Décor asked if I couldn’t find a bigger wrench for the job. Yes, ladies, I did let him live because I needed him to hang the lamp back up.
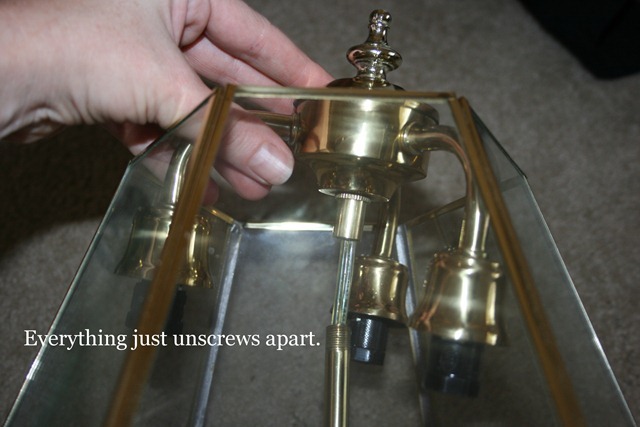
The lamp’s construction was like a series of building blocks that you just kept taking apart and going on to the next level. Kind of like a video game for DIYs.
To get the actual light fixture out of the glass I had to turn it sideways. It took me a few minutes to figure that little gem out before the light popped on in my head (pun intended) so I thought I would save you the trouble.
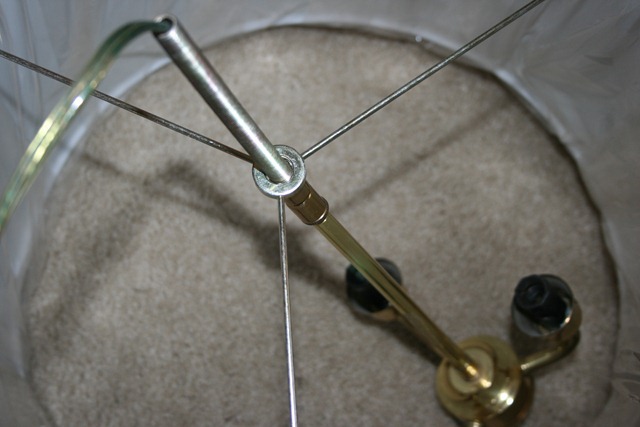
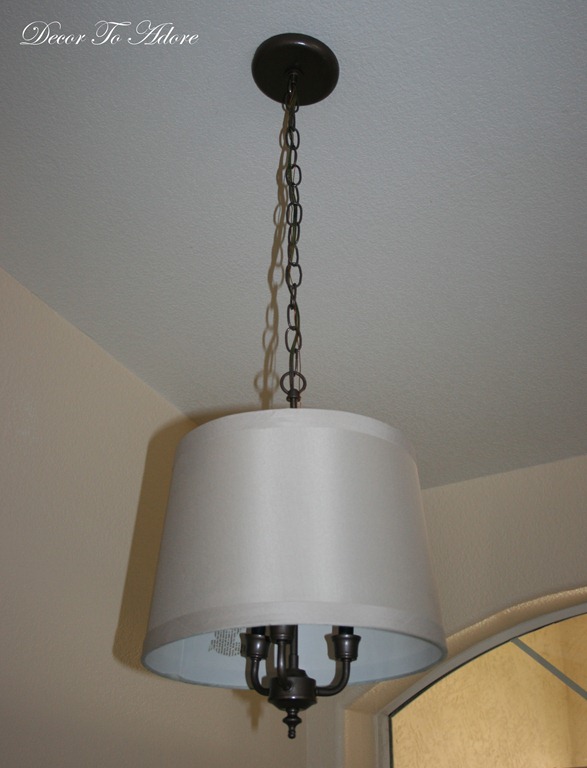
I then tried on the new lampshade to see if
A. It would actually work.
B. The size was correct.
Please notice that the lamp shade itself is wrapped in plastic. This is an important detail.
Spray Paint Prep
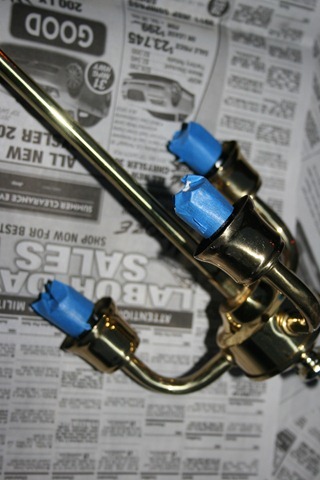
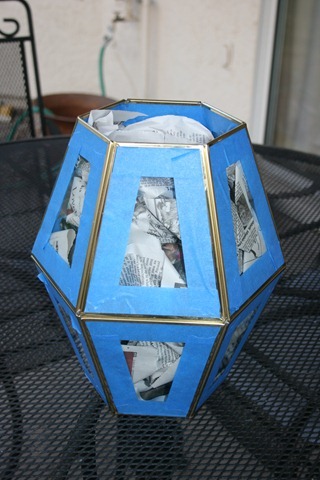
I stuffed wads of toilet paper (high class) inside where the light bulbs go and tapped it off for good measure.
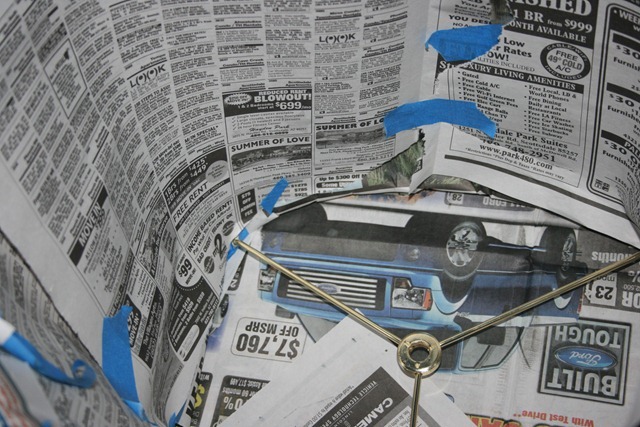
Now, even though the lampshade had temporary plastic wrap covering it, I was EXTRA careful and also wrapped the shade in newspaper since I had to spray paint the metal arms. Please also make note of this attention to detail.
Tree huggers: don’t worry, the old glass fixture is being repurposed as well, but we’ll save that for a future post.
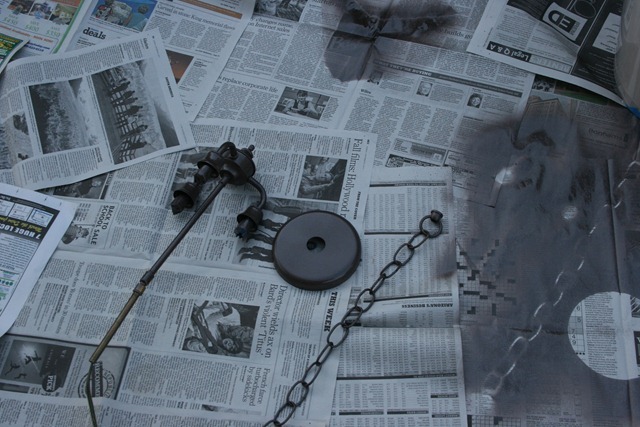
Since I live in Phoenix I had to get up at the crack of dawn (before it was blistering hot) to spray paint the metal. One trick that I have learned is immediately after painting, take two fingertips on one hand and hold a thin bamboo skewer in the other and lift the pieces off of where you have just sprayed. Then they won’t stick to the paper.
At the end of the day everything was painted, dried and re hung. While I would have loved to put a fabric cord cover over the chain, my fireman brother had strongly advised me (and now all of you) not to.
I’m Not Done Yet
You would think I would have been be delighted. Nope.
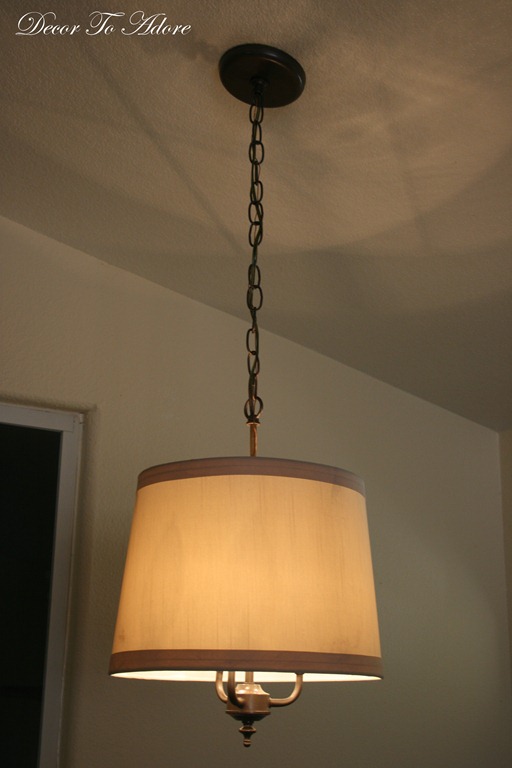
Remember how the lampshade was wrapped in plastic AND covered in newspaper before I spray painted it? When I took off the paper let’s just say I felt like the gal who has just discovered that in spite of taking two separate precautionary measures she is somehow preggars. (No comment on how I know about that. )
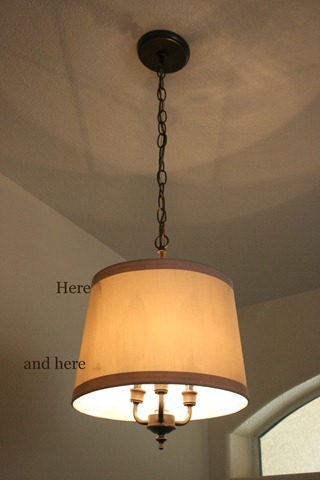
Two interior paint smudges. Grrrrr!
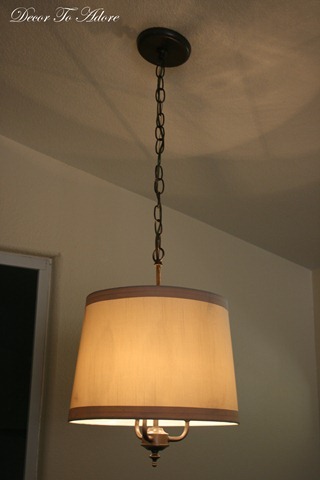
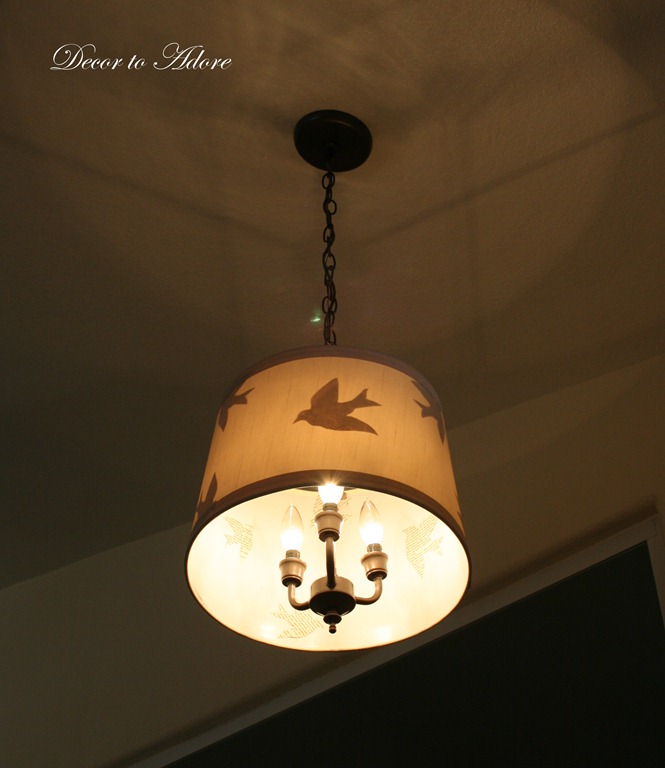
It was even worse at night when I climbed up on the 8 foot ladder to take this shot.
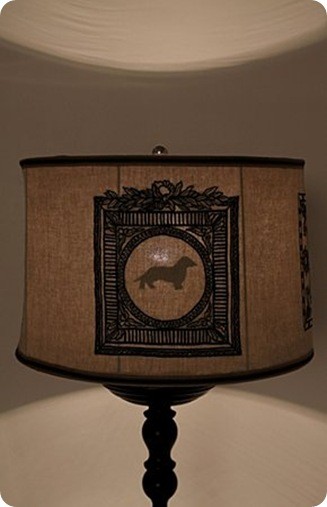
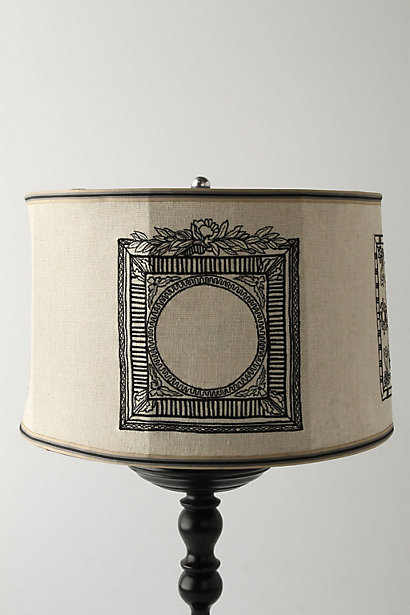
I lived with the shade for several days and then couldn’t stand it and went back to Homegoods to look for another lampshade. I saw a burlap shade with black trim that was so cute, but way too big. As I was standing there pouting, another light bulb popped on in my head. I remembered a lampshade that Anthropologie sold last year. I had wanted it SO bad!
When the lamp was turned on, a silhouette of my oh so lovely Rudi appeared.
Birds In Flight
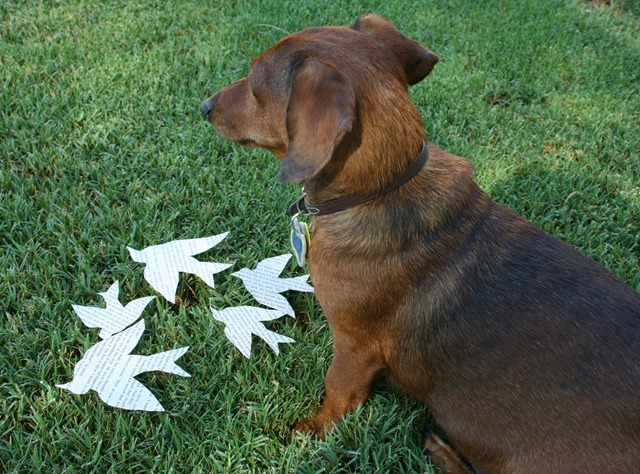
I left the store empty handed and raced home. During the drive I thought about what silhouette to use. A doxie, my kids? Since the fixture was so high up I decided upon birds. I googled “bird silhouette” and found a lovely sparrow at Karen’s Whimsy. The image was printed out in various sizes. I considered using sheet music as homage to a bird’s song, but decided to use simple paperback book pages for a more airy feel. My bird dog approved.
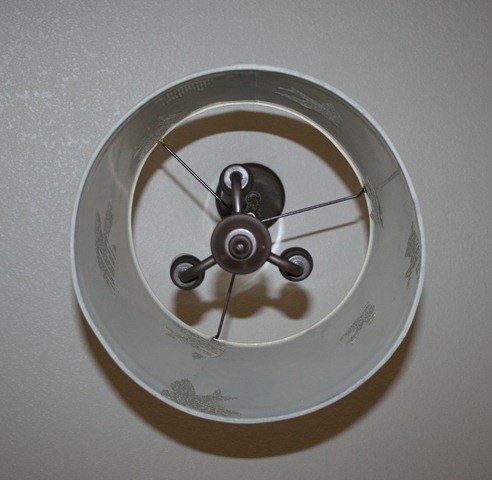
A teeny tiny dab of hot glue was placed on the beak, wings and tail and then affixed to the interior of the lampshade over the spray painted boo boo’s. I then added a few extra birds to provide a balanced design.
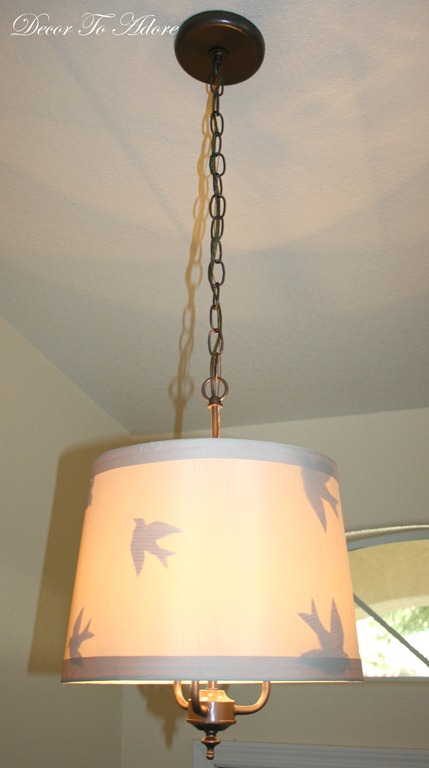
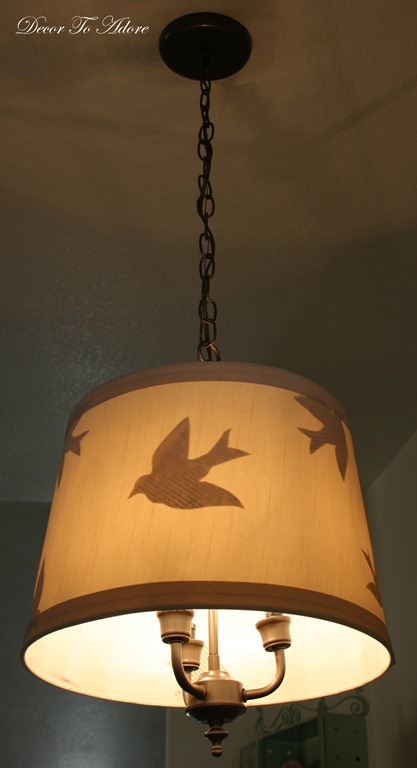
Here’s the shade in the day with the light turned on …
If the light is turned off, then no birds appear.
I really loved the shade when night began to fall. The birds really stood out.
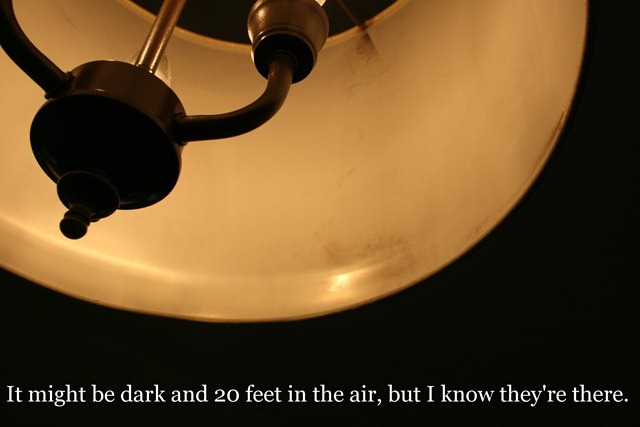
Given that the light fixture does hang 20 feet into the air I kind of like the extra interest the birds add when you stand directly under it.
I think it’s kind of a sweet tweet.
Have you ever turned a decorating faux pas into something fabulous?
Laura
That turned out amazing Laura!! I loveeeeeeeeeee it!! :):):):):):):):):):):)
What a brilliant idea, I absolutely love it!
Oh, Laura! That's simply breathtaking, as in, took my breath right away.
Swoon-worthy effect at night! Genius solution!
Love it~
🙂
IT'S ABSOLUTELY MAGNANIMOUS! I LOVE IT! I EVEN AUDIBLY PROCLAIMED AS MUCH. My husband said, “What is?” Hahahaha!
You really turned that boo-boo into boo-tiful! I sooooo love the birds, girl!
I love it so much! You're a creativity queen!
Love this! It turned out amazing! As a girl who did turn up preggers after 2 separate precautionary measures, I can totally relate. Love your solution! Thanks for sharing.
Who would have thought! It came out amazing….can't even tell it is anything close to what it used to be. I think you may have stumbled onto a new side job…repurposing old light fixtures!
Marianne 🙂
What an awesome idea Laura….I love it!
Have a wonderful day,
Gail
Now that's one of the best lamp re-dos I have ever seen! Good on you for not giving up. It looks just fantastic. I need about 3 new lampshades!
You are just too clever for words! I love it. I have a similar one in the garage that I took down when we moved in four years ago, because I rehung one that I already had. I have been looking for a clever way to recycle this one, having had some dreams like yours for those fancy expensive lanterns. I am actually thinking of putting it in the WC of the Master Bath. I do like your idea and now I might try this. How do you think seashells would look? I have a beachy thing going on in there with gray, white and ivory.
Brilliant!..pun intended!
xo Cathy
Wow, what a transformation, you did a phenomenal job! I absolutely LOVE the finished product. Bye-bye brass, hello…style! =) Love it!!
I will add you to my sidebar, so I don't miss any posts! =) Oh, and stop by to enter my fall giveaway!
Have a wonderful day! XO ~Liz
You did a great job, Laura. It looks very pretty especially with the addition of the birds….Christine
As always, you are too clever! I love this, Laura!!! ps great pic of Rudi too!
How clever. I love it. I would have never thought of using a trick like that to cover boo-boos. I have been thinking of using a drum shade for my overhead light fixture in my bedroom as they are all the rage and WAY cheaper than a chandy, but I am not sure the “post” coming out of the center that the current shade is attached too will be long enough. I guess I will just have to figure something out. I may even add a little silhouette to mine. Thanks for the idea!
I use to have that same light in my foyer! I bought a new one, I wasn't as savy as you! great makeover, love the birdies.
It turned out beautiful, worth the trouble!
Laura, the project turned out beautifully! I love the birds – very clever! I need to do something to my entry hall fixture, too. You've inspired me. Linda
That is a fabulous transformation! I love the extra touch as well when it is turned on! Thanx for the invite! I will be back to party on Wed!:) Have a wonderful Monday!
That is clever! I love the birds!!
How talented…I would have just gone on living with the old..but this is such inspiration and to take on a challenge and come away with a wonderful new look like this tells me it really can be done! Happy Monday..
What a beautiful and creative transformation! I love it!
I am the same way about smudges, etc. My eye will find them every time I look at the piece, but I've been told that no one else notices. 🙂
GREAT job!!
Pam
It looks great!
Thanks for visiting my blog. I'll be back for the party!
Kelli @ TheTurquoisePiano.blogspot.com
Hi Laura,
Thanks for stopping by my blog and responding to my last post.
I absolutely adore what you have done with this lampshade. What a clever idea. I love that you can actually see the print on the birds themselves!
I don't know that I've ever done anything as fabulous as that, Laura… WOW! You are amazing! I love it. 🙂
Thanks for your nice comments on my dining room! I love what you did with this lamp shade! Wow! Love how you turned those smudges into something unique and beautiful! Kristen
Laura, you are too brilliant! I wish my mind worked like yours, so creative. I wondered what you were going to do with those birds you were cutting!! Bravo!! I love your new lamp!
xoxo
Karena
Art by Karena
Clever and cute – great way to work through the issues! Fast on your feet you are!
STacey of Embracing Change
I can't believe that little post about my foyer light from 2 years ago inspired you to redo yours, Laura, but I'm glad it did. Love it! I like how yours turned out much more than mine. Foyer light fixtures can be crazy expensive, so this is a smart way to recycle what you've got and save some $$.
I'm almost giddy over how you added the birdies to the new shade–what a fun idea! 🙂
What an amazing transformation and a real labor of love. You never gave up and look at what you ended up with…gorgeous. Brilliant idea to cover up the “oops” with the bird cut-outs.
Absolutely genius! Love it and am sooooo inspired:D Thanks for sharing and visiting my blog.
I love the finished project. The idea of birds inside the shade is perfect and a great way to hide a boo boo.
Just fantastic! I love it, such a great idea!
Thanks for inviting me to your party, I'll be there!
Rondell
What a fabulous job!!! You go girl! That is just awesome!
Turned out FANTABULOUS =) So cute with the little sparrows. You are much braver then I, I would have bought a new lamp in the first place. I have got to become more adventurous. You girls out in blog land have so many GREAT ideas. Thanks for sharing.
Laura, you amaze me with how clever and creative you are. I love the fixture and the birds are wonderful. What a great idea. Hugs, Marty
I love the birds. Now I will spend the rest of the day trying to find a way where I can steal your idea.
We are slowly replacing the builder's junky light fixtures. Every week I drag my husband to thrift stores, in hopes of finding something wonderful. He actually likes the Habitat for Humanity Restore, but only because I can't get sidetracked, since they don't sell clothes.
I really love how it turned out! I've been beautifying various old light fixtures as well- too expensive to keep buying new ones!
Laura, this really turned out fab 🙂 Great job!
LOVE how it turned out!! I picked the same light up at Goodwill last week to make over….I put it back. I'm SOOO regretting that now!!
Stop by Wednesday to my link party and link up, hope to see you there!
LOVE>LOVE>LOVE IT, Laura!
~Lynne
Great job! Thanks for sharing and visting my page see ya on Wed.JoAnn
Oh, love it. I have a couple of cheap brass lanterns that came with the house and I am desperate to update them. Lots of inspiration here. Liz @ Designing Domesticity
Wow, You really are so clever ! I love the little birds xx Ava
Now that is so stinkin clever I can't stand it!!!!!!!!!!! I LOVE how you solved your problem, it looks fantastic! BETTER than plain! XO, Pinky
I love this lighting fixture transformation! The detailed tutorial is great! What a great way to solve a problem! It looks new and updated!
Wow that looks great! Good job!
Wow Laura, it turned out beautifully. But you're truly persistent (as am I so I recognize a fellow traveler in the “know it's there category”) so it took a long time. But well worth it!
Will check in on Wed. and I so appreciate you stopping by.
Jane
I love the lamp revamp with the birds. I'll have to remember this one. See you Wednesday!
Laura, you did an amazing job!! It looks great!
Jocelyn @
http://justalittlesouthernhospitality.blogspot.com
you did a great job and very pretty with the birds!!
x
Amazing Laura, just love it!!!
Blessings,
Cindy
Thank you! Thank you! Thank you! I have been staring out our entry way lamp (the exact same one you have) for the last 4 years and have despised it – but couldn't justify a new one. I can't wait to locate a shade and fix it up!!!
That is a great transformation! I keep eyeing similar light fixtures at the reStore but haven't taken the plunge yet. It will have to get in line behind a host of other projects I guess.
Great light!
Great job on your light! I love that you were able to make a come back from your blemish with those cool birds.
I have this exact light fixture in my foyer plus its mates over the dining tables and in the stairwell! You are a genius! Genius, I say.
Oh, I love, love, love it! You sure do have a lot more tenacity than I do. I'm your newest follower and will be joining your party on Wednesdays. Take care.
Stunning, Laura! What an amazing job! YOu really turned your lamp into a very chic upscale lighting fixture!
I am bookmarking this… I am using this for my foyer light!
Brilliant!
Yvonne
My mistakes usually end up in the trash…this is amazing, such a great idea and a wonderful way to cover up a little error!
Love Love your light! The little bird silhouettes was a brilliant idea Laura!! It just makes the light becomes something amazing.
We took a few days off to go camping and just got home a tad ago. Was so nice to get away and it will back to full swing with ministry things tomorrow- guests staying over Wed- then food boxes Thur. and Friday-
We went up the mountains and the fall colors are in their full glory! So wanted to take some back with me for decorating the house!
bee blessed
mary
Lumineuse idée…
et tellement bien réussie!
gros bisous
Wow, what a great idea and a stunning transformation too. You are very clever!
Thanks so much for visiting my blog and for taking the time to leave a comment. I hope you have a wonderful week.
Best wishes
Natasha @ 5 Minutes Just for Me
A darling solution to your design problem. I know just what you mean about 'always knowing that the spot was there”. I had a new silk lampshade and I walked into it with a hamburger in my hand. ARGH! Grease stains I see every time I look at it.
Love,love, love the lampshade. what a trash to treasures. You know about 15 years ago I gave away 3 very huge and very expensive brass fixtures that now I would love back (but honestly where would I have stored them). This turned out so great.
Thanks for inviting me to join up. I have done a link and plan on being here tomorrow – what time?
Thanks Jacqueline
HI LAURA!!!
AMAZING,,,, that is all I can say..I am speechless, I thought OH my word, she is going to spend 100.00's on a Lamp shade from Anthro????NO…..she can make her own versions and OH so much better…I love the birds!!!!
Great lamp and I love it!!!!
Hugs,
jamie
Laura, you are a GENIUS!! I love it, and I love it twice as much because I know the story of how it all came together. What a wonderful way for a boo boo to end up making something even better than planned.
Laura, I just love your light transformation. Very cute and very clever. Great job! Have a delightful day.
Blessings,
Sandi
Laura, you did a great job turning a faux pas into something pretty. When I make a mistake, that is usually my cue to all in the professionals!!! 😀
Laura,
Remember that post you did last year about being Super Woman? Well, I can see you are still sporting that cape!
{I was wondering why you were cutting out bird silhouettes on Sunday.} The burlap shade from Anthro is charming but I bet the price tag wasn't. Besides, you would have had to stencil a parachute on Rudi's portrait. I prefer your shade with the sweet sparrows in flight. Perfection aka “Oh those paint smudges? I meant to do that.”
Your Friend,
Deborah
How lovely, Laura! Well, nearly everything I do is a decorating faux pas – sometimes fabulous, sometimes not-so-great. But how ingenious to come up with the birds! Love it.
And I'll definitely link up tomorrow!
Brilliant and beautiful Laura!!!
The bird idea is genius. Never would have thought about that.
This turned out awesome Laura…absolutely awesome. Good job girl!
Fascinating post. It amazes me the creativity that sparks with the home decor. Such talent.
Laura, this is simply brilliant. And I love the birds. It is really nice when accidents turn into happy accidents. Thanks for sharing. I will be pinning and sharing this!
Brittany aka Pretty Handy Girl
Laura, love your ideas and the lightshade fixtures…such good ideas! And thanks for the invite to the fall party. I can't wait! I love fall and decorating and cooking for fall. So much fun!
Blessings,
Debbie
Very nice! I love how you fixed it.
I have been looking at shades differently ever since reading this post. I love this idea and it opens up a whole new world of possibilities. Thanks so much. I can't wait to try this.
i love, love, LOVE this and want one for my house! great tutorial!
amy
OH!! LOVELY!!! I have been itching to do something similar… by papercutting a scene or something and putting it just as you did with the birds. In the future you could do something like that, too… I love how yours turned out!!!! Will definitely keep that idea in mind… 🙂
Your lamp shade looks awesome!! What a great idea! And I love it too!!!!
~Linnea
What a cool make-over! TFS!!!
great idea on the lamp and i love the shade. thanks for the invite to your party
I love how the birds just make it perfect. I need to find a place I can get a light kit with the socket included for a swag lamp I want to re-do and I'm not having any luck.
Laura,
This makeover looks outstanding…I'm so happy that I came by and saw it!!!
Blessings,
Linda
Hi Laura, what a fabulous job you did with the lamp, patience and perseverence paid off. Thanks for sharing. I have recently found your blog and am now following you, and will visit often. Please stop by my blog and perhaps you would like to follow me also. Have a wonderful day. Hugs, Chris
That's just brilliant! Way to solve a problem. 🙂
LOVE the whimsical added touch of the birds to the lampshade. You did a beautiful job!
Re covering the chain and wiring. If you have additional 'shafts' you can join them together with the use of a (female) coupling usually sold in packages of two. Method: Remove the chain and run the wires up through them then add a short threaded pipe for installation into the ceiling canopy.
I created a large pendant light similar to what you did, however I had to increase the size of hole that was in the spider-ring lampshade as I wanted the bottom of the chandelier base to be inside the shade not hanging below it. Actually it was the most time consuming step of the whole process but mission was finally accomplished. -Brenda-
I'm curious about what happened to the glass fixture personally… 🙂
Mel Bou it was turned into a terrarium.