
Tutorial Creating A Painted Floorcloth
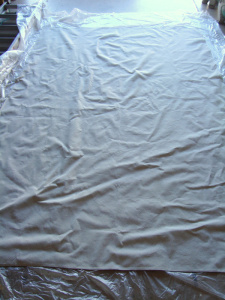
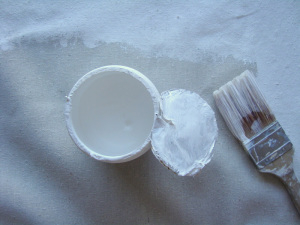
Invest In a Good Paintbrush
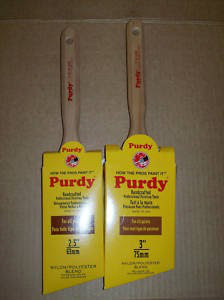
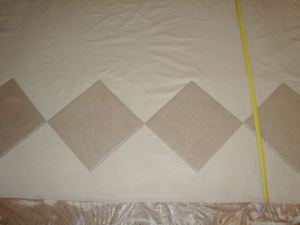
The use of blue chalk lines really helped in keeping the pattern straight. The angle of the XL 2.5″ Purdy paintbrush worked well in creating the sharp diamond points.
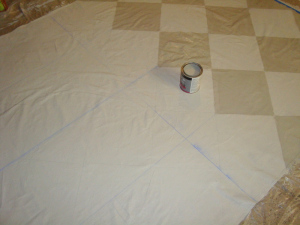
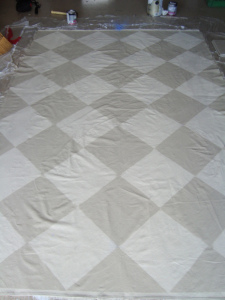
Truth time. This wasn’t a tremendously hard project, but it did take 3 days to finish due to the drying time that each coat of gesso, paint, and varnish required. I agree with Martha that stapling the canvas onto a sheet of plywood or old door would be MUCH easier. It was a little tough to paint the canvas just lying flat on the ground. But due to the large size of canvas I was creating, the plywood would have cost more than the finished project so I opted not to do this step.
I think the end result was worth the time investment. What do you think?
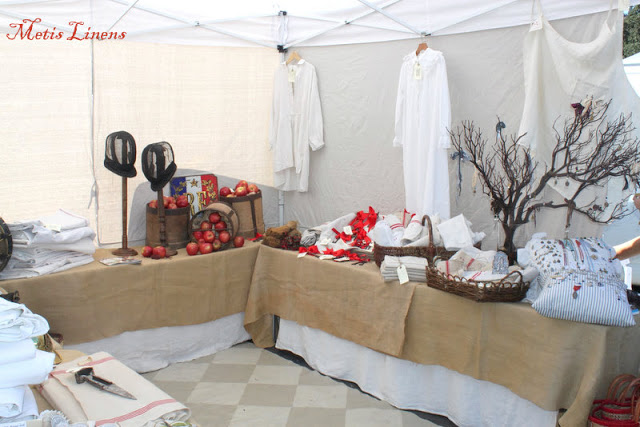
This project would be great in a breakfast area or outdoor living space. Let me know if you create your own.
Laura
It's beautiful, Laura! And it looks perfect in your wonderful Métis Linens booth. How I wish I could have been there.
Your floorcloth is gorgeous! I need something cheap and easy to roll up when necessary for my basement floor. This would be perfect!
Thanks for the inspiration! :o)
Dear Laura,
May you have a sweet day!
This is a neat way to decorate and add some character to a area needing some gusto.
Neat to see.
God bless,
d from homehaven
I have one at my front door that I've had for at least two years. We have 3 big black Lab mixes and they always moved a rug all over the place rushing the front door. I don't have this problem with the floor cloth. I really need to clean it and re-varnish but it was fun to make. I did a solid color background, then an angel design and lettering in the middle. Around the edges did squares and circles with 'stitching' kind of like pennies. Then put 3 coats of varnish – could really have used 5. It did take awhile but luckily was the size of my dining room table so I was able to paint it standing up. Lots of layers though.
The floorcloth is just perfect in the booth! Like a piece of art for the floor; I hope your readers will give it a try…fantastic job!
The floorcloth & the booth both look lovely! Lots of luck to you!
I love it. I think I'll try to do it for my kitchen. It's 1950's red, black and white. Perfect black and white diamonds.
Wow! What a wonderful piece of work, Laura! You amaze me!
Love your new blog title!! Hee hee!
XO,
Jane
G'day, Laura ~
What a fabulous floor cloth, very creative & clever.
Have a great eve ~
TTFN ~ Hugs, Marydon
I am smiling
at your “moment
of truth” as I
am in the middle
of a what should
have been a fairly
simple painting job ~
Are they ever really
simple? But in your
case, definitely a
great investment ~
your booth looks
sooo inviting!!
Bravo!
xx Suzanne
Hi Laura, The floor cloth is fabulous! I painted a small one some time ago for my kitchen and it lasted several years.
I sent you my address for the damask napkins. Please email me if you didn't receive it. My email has been acting up.
xoxo,Sherry
Yes, most definitely worth it! The booth looked superb and that floor was the finishing touch. Congrats on a great start to your new venture. I especially love the medals and such that you had pinned to those pillows. Also, the embroidered linens. Oh, my, it's too hard to pick favorites.
Now, dish, how much do you hate Betty Draper? I know you ran off to watch Sunday's episode! Ann
Laura thank you so much for this tutorial! I've wanted to do this for a while but haven't looked into the details. Yours is gorgeous! Your booth is SO pretty -would have loved to pick through it! Jen
That is beautiful! You did an amazing job!
How fun! Thanks for the tutorial. Lisa~
This is simply amazing Laura!! BEAUTIFUL work! :):):):):):):):):):):):):):):):):):)
Laura I am so glad for the tutorial as I have wanted to do this and have a painters canvas in the back of my Jeep!!
It turned out beautifully!
xoxo
Karena
Art by Karena
I'm loving the name of your blog right now!!!! I got some of those brushes and need to use them. LOve this idea. I highlighted this at somedaycrafts.blogspot.com tonight!
Oh cool. Im doing an event next weekend in Georgia. This adds so much to the space, makes it feel more welcoming. If I can find the time, I will def. do this! Thanks!
I love your rug! I don't have any place to use one or I'ld be trying my hand at that fun little project. 🙂
~Liz
It's wonderful! (Those painter's drop cloths are the best “secret weapon” we have for shows. Tablecloths, floors, walls – they can be put to use in so many ways!)
Jan
Laura,
A wonderful tutorial. I have painted a few floor/oil clothes. This looks fabulous in your booth. I'm surprised no one made you an offer on it! (Btw, how much are you asking for it? )
Your Friend,
Deborah
Love this! I've gotta try it! Oooh I also want you to know that I given you and award!
http://www.kreativeknack.com/2010/10/starting-is-hardest-part.html
Have a Great Day!
Nikki
Fabulous! Fantastic job!
I love drop cloths! I've used them for curtains and for tablecloths. Now, I have something else to think about! 🙂
you did a great job and that's the largest painted floor cloth I've ever seen!
It's something I always wanted to try and you made it look possible – thanks for sharing!
Beautiful! Thanks for sharing the tutorial~
Love your booth and the floor cloth. Thanks for the tutorial!
That looks really good…
I just wish I have the time and patience to pull something like that:)
Yes, the time you invested is worth it!The pattern added so much. Question: why couldn't you use a roller to put on your gesso? Let me know. K
It's wonderful and the large drop cloths are only 9.99 at Home Depot. You have motivated me to try one for the patio…how fun!
Candylei
Hi Laura, totally new to your blog, but love it so far, am your newest follower. This totally caught my eye, I love this kind of thing, and really like to see that you used a simple painters cloth, and it turned out fabulous. Great job, great looking booth, and look forward to spending more time checking your blog out. I host a weekly party **Amaze me August** and would love if you joined. Hope you can make it, and if not then keep me in mind next time, although I would love to share this with my readers, so hopefully 🙂 Thanks again, Bella 🙂
Wow that looks fabulous. I love the simple design. Great job!
Visiting from Funky Junk 🙂
love the diamond pattern you created. I made a rug for our dining and lived with it for a month before I decided I didn't like the color. So I turned it over, used regular wall primer and painted a new color on the back. The cloth lays FLAT now…no more wrinkles or flopping at the corners. Martha was right. Must. Prime. Both. Sides. I used double sided tape to secure the cloth to the garage floor when I painted. Worked great. Love your booth
Well worth your hard work, Laura! It's beautiful! I've always wanted to try something like this. Maybe next year when the weather is better. 🙂 Thanks so much for sharing your gorgeous work in the DIY Project Parade!
Roeshel
I've included this how-to in a round up on Craft Gossip today
http://homeandgarden.craftgossip.com/9-great-how-tos-for-your-home/ Thanks for sharing it! 🙂
If you would like a “featured by” button, you can grab one here!
http://homeandgarden.craftgossip.com/grab-a-craft-gossip-button/