When You Wish Upon A Star Craft 2. This craft is a great way to recycle old faux pearl necklaces and is easy enough to do with your children.

Here are the supplies that I used:
1. Soft gold craft paint~I used “Champagne” by Folk Art.
2. White craft paint~ you could use spray paint too.
3. White glitter
4. Wooden shapes~The stars are from Hobby Lobby and come in a pack of 4 for 99 cents. I also used crosses and hearts and am still looking for a few birds.
5. Clear-drying craft glue
6. Rick rack, lace or ribbon
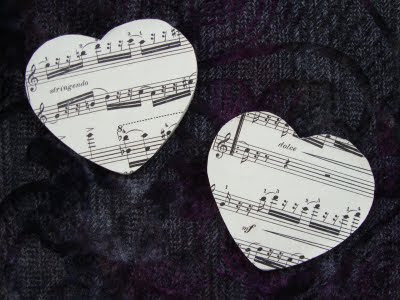
7. Sheet music or pieces of scrapbooking paper
8. Faux pearls~the older the better. I found several strands at estate sales and thrift stores. Many of the necklaces were literally just hanging by a thread.

You will want to paint the entire surface of the wood in your choice of soft gold or white. (The clothespins are for another craft.)

This is a good phase to involve your kids as it doesn’t have to be perfect.
 Pearls of Wisdom
Once the pieces are completely dry you will want to sand the edges to create a worn look. Or you can skip this step.

Next, if your wooden piece does not have a hole at the top for hanging then you will want to create one via a drill or a hammer and nail. You also have the option of just gluing a ribbon loop onto the back. Thread your selected piece of ribbon (I used antique lace.) through the hole. After the first two stars, I began using a large needle and it was much easier.

On the opposite side of your wooden ornament glue on a paper backing. On some of my ornaments I left the paper plain, others received an edging of glitter, but my favorite technique was applying a thin layer of soft gold paint over the paper.
I created a big mix of white, cream, gray, pink and champagne colored pearls.

Coat the front of the piece with a GENEROUS amount of glue. Scoop up a handful of pearls and cover the entire surface. Shake off the excess and go back and place a pearl in any empty spaces.

When You Wish Upon A Star Craft 2
Let the piece dry completely. It will have some weight to it, so hang the ornament on a heavier tree branch.


Go make a beautiful mess and be blessed.
Laura
Love this! I have a large bag of pearls from broken necklaces that belonged to my grandmother. How wonderful it would be to make ornaments for our tree.
I am so doing this. I have a bag of broken jewelry that a friend gave me when she was cleaning out last spring, and there are loads of pearls in there that I haven't known what to do with them.
Great idea! I love the creamy colors of the pearls, good that you used so many different tones, I like that!
Now I am curious to know what you have done with the clothespins!
Good Morning Laura…
Oh my goodness, what a beautiful craft. I will be picking up supplies for this. I think the grandkids will love making some. I love the way they look.
I think after I add the glue, I am just going to have all the pearls laying flat on a cookie sheet, and turn the star over and press. I don't know if it will work, but if they pick them up with their hands we will have pearls everywhere.
This will be a fun craft. I can't wait to try and the kids will be here this weekend. Oh Boy!!
Stop by and see what I have been busy making at night. I posted one so that you all could see. I was so pleased with the way they turned out.
How's your missy doing? I think of her all the time, and pray she continued her path to reach the goal she so desired. She has it in her.
See ya soon. Country hugs…Sherry
They are beautiful and such a great idea for a craft to do with the children. Hugs, Marty
oh i love this! i have been looking for Christmas craft ideas, my daughter would even enjoy helping me with the star. thanks!
These are really beautiful. A great craft activity to do with the kids.
Very cute! I love the stars. I may have to try this one.
Laura, this is a fantastic idea for children, thanks for sharing!
It is amazing how good they look on the tree.
Hugs,
Margaret B
Very pretty, Laura! This does seem like a good project to do with kids.
Oh, I love them!!!
I might have to try those next year.
I LOVE that idea!
Awesome idea, Laura!! The ornaments turned out so pretty and I like the idea of using them on gifts and for napkin rings! Thanks!
xoxo
Jane
So beautiful!! I love the golds and creams together!
Love them!
Lou Cinda 🙂
What a great idea and so beautiful! Thanks so much for sharing, Esther
you are so creative..I think this has to be the simpliest and most fab that I have seen in awhile..thanks for sharing..
These are gorgeous, Laura, and an excellent excuse to pick up more old pearls this weekend 🙂 I don't know that I'll get them done for this year, but I can save the project for next year 🙂 Maybe in July!
Laura,
These are gorgeous! Thank you for the idea.
I also love the beautiful background on your blog right now. Lovely! 🙂
~Linda
Those are great Laura! Thanks for the thorough tutorial. I'll be making some of those for myself, and I'm sending this link to a friend of mine who's looking for some ornaments to do with her grandkids.
Happy Holidays!
These are adorable! Your are so clever!
~Liz
Easy, yet elegant–that's a keeper! I like the crosses, too, and how the pearls sit in the cut out!
Very cute:) I love to see what all your blog has to offer. Always a joy to read!
Christmas blessings,
Jill
Very pretty! What a fun thing and would be a great gift too!
-c
yapping cat
These are beautiful!!! Thanks so much for sharing. Love & blessings from NC!
So pretty, Laura! I love the crafts I can finish quickly! I'm waiting on Canton on Friday to finish up your swap gifts so I'll mail yours on Saturday! Suzie
So easy but the pearls really make them look elegant. Love it!
Oh, those are beautiful! Plus, if you have colored pearls you could match them to your tree colors if you do that like I do. lol.
This is going to be my tree craft for this year, I believe.
Soo beautifull.I need to do just that- sit and do crafts to get in the spirit! Saw you on Today Show!!Made me smile!
Laura, these are soo lovely.. You did a wonderful job..
I'd love for you to stop by my new blog/shoppe and enter my apron giveaway..
http://apronstringsbypaisleycat.blogspot.com/
Hi Laura!!!
I so love your little craft lessons!!! One day Miss Camdyn will be old enough to do crafts and I will want to make some with her that are easy and inexpensive!!!!
Thanks for the lessons!!!! I could help you decorate if I had more free time, late at night I'm always available!!!!!haha
hugs,
jamie
Oh, how pretty! How did you know those would match our tree perfectly?
How beautiful. I have LOADS of beads. I think I might have to rope my sister into making some of these with me. Thanks!
pk @ Room Remix
That is such a clever way to reuse the beads and they turned out beautifully! Thanks for sharing the idea. Have a good weekend!
The cross ornament is my favorite, I like the white wood with the pearls filling the center. Just lovely!
oh, so pretty… may just use this for some homemade gifts i am trying to organize for my kids to make. looks fun and so pretty.
thank you…
These turned out great. I like the idea of coating the star with glue and dumping the “pearls” on it, great time-saver.
Jane
How pretty they are. My tree is decorated in gold so I probably be on the look out for some old pearl necklaces. I love your ornaments!
Those are so pretty!!
These are so pretty and easy. They would be nice for a smaller pearl & lace themed tree.
@cheapchichome.blogspot.com
What a great idea! This would be perfect for an ornament exchange! Thanks for sharing! Charlene
Your crafts are all gorgeous!! Wow! I am going to be looking for old necklaces at thrift stores/yard sales to do some of these! They look simply stunning! 🙂
Thanks for stopping by!
Wow, those are so pretty, love the stars best!
Loving these!
CUTE! THANKS FOR SHARING.
JANICE
Again, oh so gorgeous girl ! Love love love the medley of pearl and gold. Thanks for linking !
Hugs,
Kate
those are gorgeous!! i love how the cross has the frame edging. I'll be keeping my eye out for supplies to make these – thanks!
These are gorgeous. I would love to have you post these to my Celebrate the Holidays party today.
Cheri
These are just breathtaking.
Thank you so much for posting them.
Merry Merry Christmas-Laura.
Cheri
I posted my favs and you are listed
Cheri
Hi Laura,
These ornaments are absolutely wonderful and I would love to link to this tutorial on AllFreeChristmasCrafts.com. Our readers are always looking for ways to repurpose items they already have. If this is something you'd be interest in, please let me know. My e-mail address is jlitz (at) primecp (dot) com. Thanks!